
If you’ve ever seen a leaning fence after one winter or a windy season, you already know the truth: fence strength starts and ends with the posts. Panels, rails, pickets—they’re all easy to fix. Posts are not.
The goal here isn’t just “good enough.” It’s installing posts once and not thinking about them again for 15–20 years.
I’ve installed posts in clay, sand, rocky soil, and slopes—and the difference between a fence that lasts and one that fails comes down to a handful of key decisions most people rush through.
Fence Post Installation Planner
Get a practical recommendation for hole depth, hole width, gravel base, concrete needs, and install method before you start digging.
Enter Project Details
Your Recommended Setup
The Core Principles (Don’t Skip These)
Before tools, before digging—these are your non-negotiables:
- Depth matters more than anything
- Drainage prevents rot
- Alignment affects the entire fence
- Soil type changes your strategy
A strong rule:
👉 Your post should be buried at least 1/3 of its total length
For a typical 6-ft fence, that means:
- 2–3 feet deep minimum
Step-by-Step: The Right Way to Install Fence Posts
1. Plan Your Layout First (Most People Mess This Up)
- Run a string line for alignment
- Mark post spacing (typically 8 feet apart for wood fences)
- Identify slopes and soil conditions
2. Dig the Hole (Precision Matters)
- Hole width: 3× the width of the post
- Hole depth: 1/3–1/2 post height
- Add +6 inches for gravel base
Example:
- 4×4 post → 12-inch diameter hole
- 6-ft fence → ~30-inch deep hole
Fence Post Hole Size Chart (Quick Reference)
| Fence Height | Post Size | Hole Depth | Hole Diameter | Concrete Needed |
|---|---|---|---|---|
| 4 ft fence | 4×4 | 18–24 in | 8–10 in | 1–1.5 bags (80 lb) |
| 6 ft fence | 4×4 | 24 in | 10–12 in | 1.5–2 bags (80 lb) |
| 8 ft fence | 4×4 | 30–36 in | 12–14 in | 2–3 bags (80 lb) |
| 6–8 ft heavy-duty (privacy) | 6×6 | 30–36 in | 12–16 in | 3–4 bags (80 lb) |
| Gate posts (any height) | 6×6 | 36–42 in | 14–18 in | 4+ bags (80 lb) |
3. Add Gravel Base (This Is What Saves Your Posts)
- Add 4–6 inches of crushed gravel
- Tamp it down firmly
Why it matters:
- Prevents water pooling (major cause of rot)
- Reduces frost heave
👉 Skipping this is one of the biggest long-term mistakes.
4. Set the Post (Perfectly Plumb)
- Place post in center of hole
- Use a level on two sides
- Brace with scrap wood
Even a slight lean now becomes obvious once panels are attached.
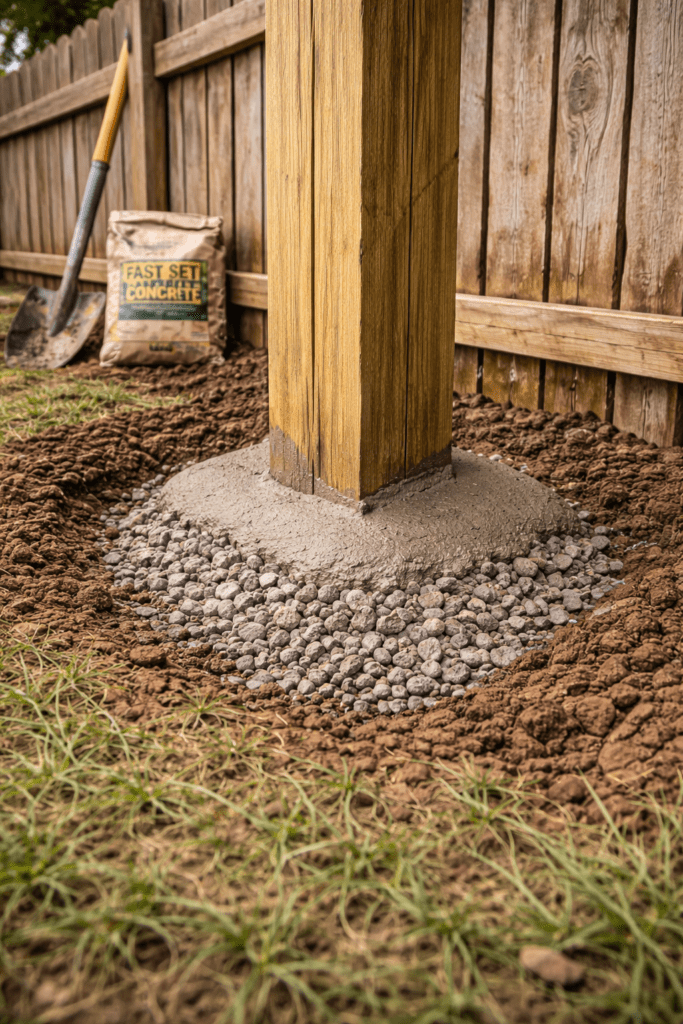
5. Concrete vs Gravel: Choose Based on Soil
Concrete (best for most situations):
- Loose or sandy soil
- Tall fences
- High wind areas
Gravel-only (good in specific cases):
- Heavy clay soil
- Areas with drainage issues
👉 Concrete provides stronger long-term stability, while gravel improves drainage but sacrifices rigidity. See how gravel compares to concrete here.
6. Pour Concrete the Right Way
- Fill to 3–4 inches below ground level
- Slope the top away from the post (shed water)
- Let cure 24–72 hours minimum
Pro tip:
👉 Don’t bury the concrete flush with soil—that traps water.
7. Final Alignment Check
Before the concrete sets:
- Re-check plumb
- Re-check height consistency
- Re-check spacing
Because once it sets—you’re done.
Decision Guidance (What Actually Matters)
If You Want Maximum Longevity
- Use concrete + gravel base
- Go deeper than minimum depth
- Seal or treat post bottom
For Easier Repairs Later
- Consider gravel-only install
- Accept slightly less rigidity
If You Have Sandy or Loose Soil
- Always use concrete
- Consider deeper holes
If You Have Clay Soil
- Focus heavily on drainage
- Gravel becomes more important
Trade-Offs and Risks
Concrete Pros
✔ Strong, stable
✔ Best for long fences
✔ Handles wind loads
Concrete Cons
✘ Can trap moisture if done wrong
✘ Harder to repair later
Gravel Pros
✔ Excellent drainage
✔ Easier replacement
Gravel Cons
✘ Less stable
✘ Not ideal for loose soil
Realistic Expectations
- A properly installed post should last 15–25 years
- Poor installation can fail in 1–3 seasons
- Most failures come from:
- Shallow depth
- No drainage
- Poor alignment
Time to Complete
| Task | Time |
|---|---|
| Layout & marking | 1–2 hours |
| Digging holes (10 posts) | 3–5 hours |
| Setting posts | 2–4 hours |
| Cure time | 24–72 hours |

Printable Checklist
Fence Post Installation Checklist
- Layout string line set
- Holes dug to correct depth
- Hole diameter 3× post width
- Gravel base installed and compacted
- Posts leveled and braced
- Concrete poured and sloped
- Final alignment checked
- Cure time respected
Recommended Products
- Fast-setting concrete mixes
- Post hole diggers or augers
- Post levels and alignment tools
Frequently Asked Questions
How deep should fence posts be?
At least 1/3 of the post height, typically 2–3 feet for a 6-ft fence
Should I use concrete or gravel?
Concrete for strength, gravel for drainage. Most installations benefit from both (gravel base + concrete).
How far apart should fence posts be?
Typically 8 feet for wood fences, but varies by material and terrain
Do I need to go below the frost line?
In colder areas, yes—this prevents posts from being pushed up by freezing soil
How much concrete per post?
Usually 3–5 bags (50 lb each) for a standard 4×4 post
Conclusion
If you take one thing from this:
👉 Depth + drainage + alignment = a fence that lasts
Everything else is secondary.
Most fence failures aren’t bad materials—they’re rushed installs. Take the extra time on the front end, and you’ll save yourself from tearing out concrete and resetting posts later (which is a miserable job).
Install it right once—and move on.
Resources
- This Old House – Fence installation basics: https://www.thisoldhouse.com/fences/post-installation
- Quikrete – Setting posts guide: https://www.quikrete.com/athome/settingposts.asp
- Penn State Extension – Post depth guidance: https://extension.psu.edu/programs/master-gardener/counties/montgomery/news/post-holes-for-garden-fences-and-gates