
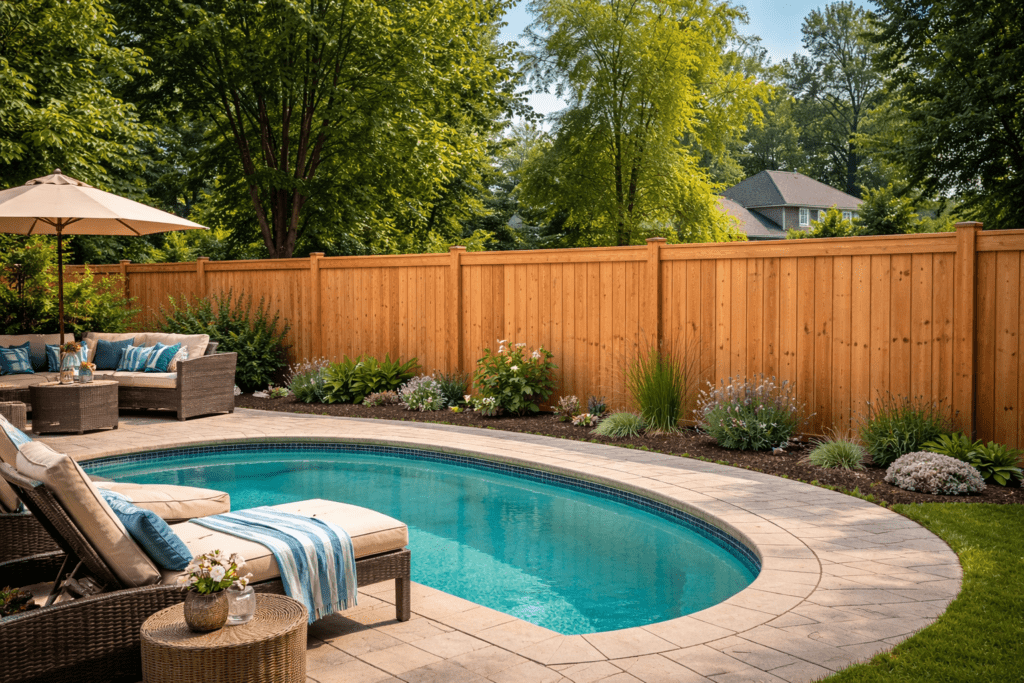
If you’ve ever had to replace a fence post after just a few years, you already know how frustrating it is. Digging, hauling concrete, resetting—it’s not a job you want to repeat anytime soon. The truth is, most fence posts don’t fail because of age—they fail because of how they were installed.
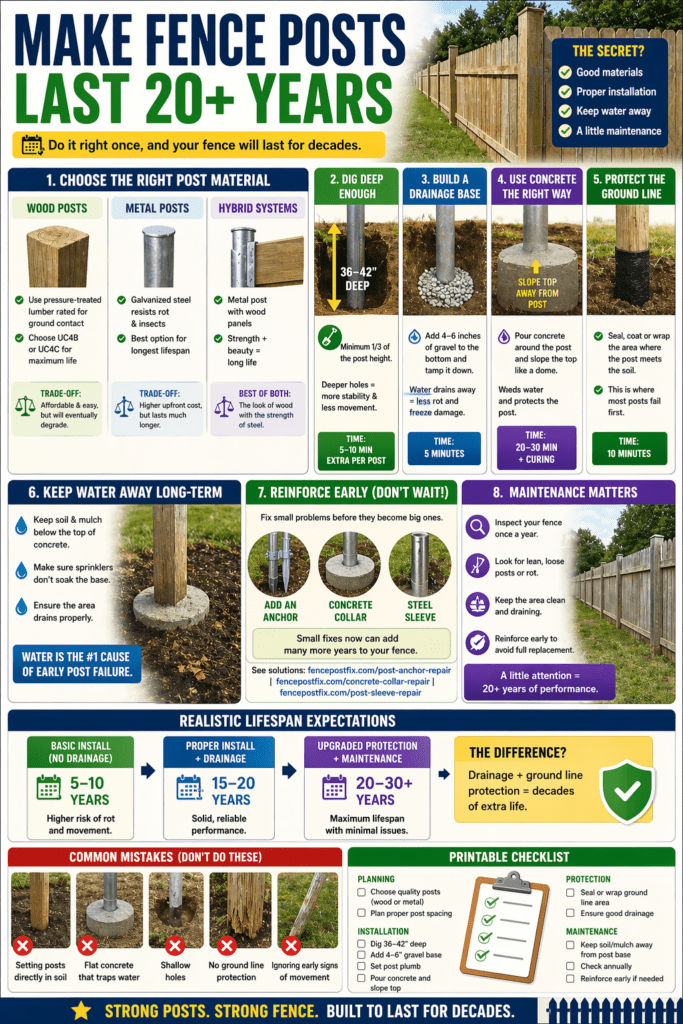
I’ve seen posts last 25+ years in tough conditions… and others rot out in under 5. The difference comes down to a handful of decisions you make upfront—and a few habits you stick to over time.
Let’s walk through what actually works if your goal is long-term durability.
What Really Causes Fence Posts to Fail
Before you can extend lifespan, you need to understand what kills posts:
- Water exposure at ground level (biggest culprit)
- Poor drainage trapping moisture
- Wood-to-soil contact without protection
- Shallow or undersized concrete footings
- Freeze/thaw movement loosening posts
- Rust (for metal posts)
If you fix these issues at install, you’re already ahead of 90% of fences out there.
Step 1: Choose the Right Post Material
Wood Posts (Most Common)
- Go with pressure-treated lumber rated for ground contact
- Better yet: upgrade to UC4B or UC4C treatment levels
- Cedar looks great, but it won’t outlast properly treated lumber in soil
Trade-off:
Wood is affordable and easy to work with—but it will eventually degrade, even with the best prep.
Metal Posts (Best for Longevity)
- Galvanized steel posts resist rot entirely
- Ideal for long-term installs and high-moisture areas
Trade-off:
Higher upfront cost, but significantly longer lifespan with minimal maintenance.
Hybrid Systems (My Favorite Approach)
- Metal post + wood fence panels
- You get the look of wood with the strength of steel
This is one of the easiest ways to push past that 20-year mark.
Step 2: Dig Deeper Than You Think
This is where most installs go wrong.
Minimum depth:
- 1/3 of post height (absolute minimum)
- 36–42 inches in most cases
Why it matters:
- Prevents leaning
- Reduces movement from wind and soil shifts
- Keeps the base stable long-term
Time to complete:
5–10 minutes extra digging per post → saves years of headaches
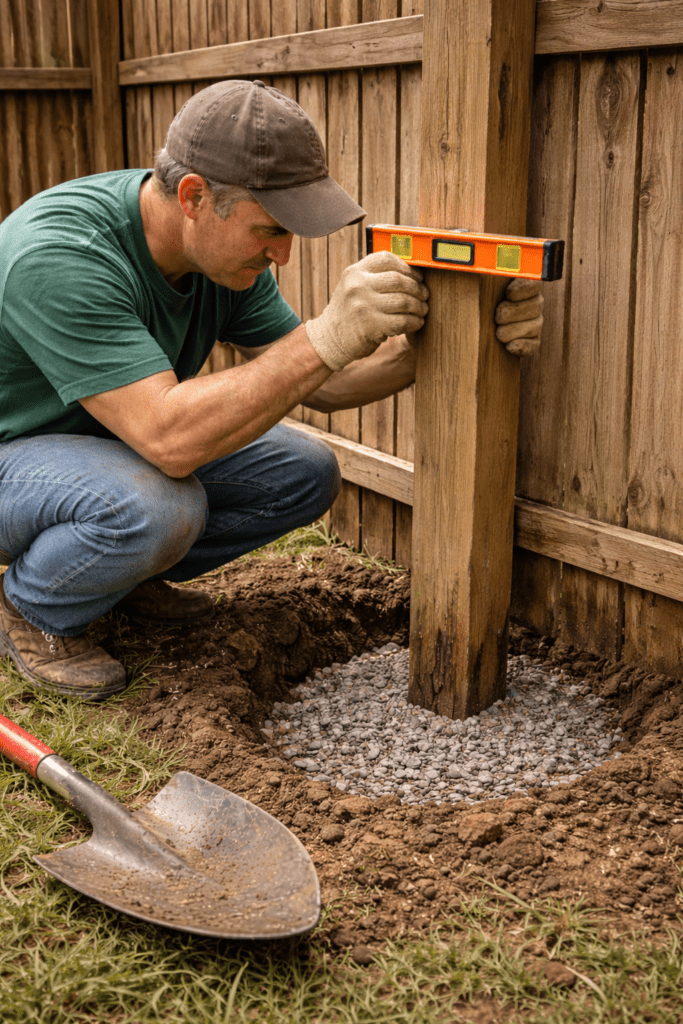
Step 3: Build a Proper Drainage Base
Never set a post directly into soil or wet concrete without a base.
What to do:
- Add 4–6 inches of gravel at the bottom of the hole
- Tamp it down before setting the post
Why it works:
- Water drains away from the base
- Reduces rot and freeze damage
This one step alone can double the lifespan of a post.
Step 4: Use Concrete the Right Way
Concrete isn’t the problem—bad concrete technique is.
Best Practice:
- Pour concrete around the post
- Slope the top away from the post (like a dome)
Why:
Flat concrete traps water. Sloped concrete sheds it.
👉 Heavy Duty Reinforcement methods
Time to complete:
20–30 minutes per post (plus curing)
Step 5: Protect the Ground Line (Critical Zone)
The area right at soil level is where posts fail first.
For Wood Posts:
- Apply bitumen coating, wood preservative, or sealant
- Wrap with a post sleeve or barrier
For Metal Posts:
- Inspect coating and touch up scratches
- Avoid direct contact with corrosive soil if possible
Realistic expectation:
Even treated wood benefits massively from added protection here.
Step 6: Keep Water Away Long-Term
Installation gets you most of the way—but maintenance matters too.
Simple habits:
- Keep soil level slightly below the top of concrete
- Don’t pile mulch against posts
- Ensure sprinklers aren’t constantly soaking the base
These small things prevent constant moisture exposure—which is the #1 cause of early failure.
Step 7: Reinforce Early (Don’t Wait for Failure)
If you notice even a slight lean or looseness, fix it early.
- Add an anchor
- Reinforce with a collar
- Install a sleeve
Why this matters:
Small fixes now prevent full replacements later.
Realistic Lifespan Expectations
Here’s what you can expect if you do things right:
- Basic install (no drainage): 5–10 years
- Proper install + drainage: 15–20 years
- Upgraded protection + maintenance: 20–30+ years
The jump from 10 → 25 years usually comes down to drainage and ground-line protection.
Common Mistakes That Shorten Lifespan
Avoid these and you’re already ahead:
- ❌ Setting posts directly in soil
- ❌ Skipping gravel base
- ❌ Flat concrete that traps water
- ❌ Shallow holes
- ❌ No sealing or protection at ground level
- ❌ Ignoring early signs of movement
Printable Checklist: Long-Lasting Fence Posts

Planning
- Choose pressure-treated or metal posts
- Confirm proper post spacing
Installation
- Dig 36–42 inch hole
- Add 4–6 inches gravel base
- Set post plumb
- Pour concrete and slope top
Protection
- Seal or wrap ground-contact area
- Ensure proper drainage
Maintenance
- Keep soil/mulch away from post base
- Check annually for movement
- Reinforce early if needed
Frequently Asked Questions
What type of fence post lasts the longest?
Galvanized steel posts typically last the longest because they don’t rot, especially when properly installed.
Does concrete make posts rot faster?
Not if done correctly. Poor drainage and flat concrete are the real issues—not the concrete itself.
Should I use gravel or concrete—or both?
Both. Gravel for drainage at the bottom, concrete for stability around the post.
How do I protect wood posts underground?
Use pressure-treated lumber plus a sealant or barrier wrap at the ground line.
Is it worth upgrading posts on an existing fence?
Yes—especially corner and gate posts. Reinforcing key posts can extend the life of the entire fence.
Reputable Resources
- American Wood Council – https://www.awc.org
- ASTM International – https://www.astm.org
- International Code Council – https://www.iccsafe.org
- U.S. Consumer Product Safety Commission – https://www.cpsc.gov
Final Thoughts
If you take nothing else from this: water is the enemy, and drainage is your defense.
You don’t need fancy materials or complicated systems to get 20+ years out of your fence posts—you just need to install them like you don’t want to touch them again anytime soon.
Do it right once, and your future self won’t be out there digging holes in five years.